What is PPAP 18 Documents?
PPAP 18 documents are a set of documents that necessary for PPAP process. Which is often requires as a standardize process in the automotive industry. The set of documents may helps to ensure that the customer’s requirements are met. This is a specific version of the PPAP [Production Part Approval Process] process.
List of PPAP 18 Elements:
- Design Records
- Authorized Engineering Change Documents
- Customer Engineering Approval
- Design Failure Modes and Effects Analysis (DFMEA)
- Process Flow Diagram
- Process Failure Modes and Effects Analysis (PFMEA)
- Control Plan
- Measurement Systems Analysis (MSA)
- Dimensional Results
- Records of Material / Performance Test Results
- Initial Process Studies
- Qualified Laboratory Documentation
- Appearance Approval Report (AAR)
- Sample Production Parts
- Master Sample
- Checking Aids
- Customer-Specific Requirements
- Part Submission Warrant (PSW)
It is mandatory that the supplier shall understood customer requirement e.g. drawing, specifications, and technical requirements etc., by obtain prior approval from the customer exceptions or deviations to PPAP requirements. On failure to meet these requirements, customer must have notified for determining appropriate corrective actions to enclosed all similar products, and the documents maintained for these processes should be available with reference documents. Ok so, let’s see how to prepare documentation and perform related activities to successfully approvals from customers as documents & evidences provided to customers:
Design Records
The organization shall have controlled documents of drawing, technical documents and engineering standards received from customers and propriety material / product supplier should maintain controlled documentations of customer approved drawings and standards as customer norms. The supplier must also refer the product drawing of details for assembly / manufacturing processes and relevant standards.
At documentation & communication side, supplier must verify the amendment, change in the letters, modified and applied date, and changes in drawing must mentioned on the drawings, and standard with the one on customer’s purchase order communicated & amended same, more over the internal communication with head of department, team leader updated as appropriately. You have to verify & checked all the updated documents, drawing, standards, norms and design records must be followed during the PPAP activity, and retained in PPAP submission file.
Authorized Engineering Change Documents
Authorized change documents provided by customer incorporated in the part not incorporated in the drawing, but incorporated in the product, part or tooling. During the product development suggestion can raise from product development team in the product, part or tooling by research and development team or engineering team which is not yet incorporated in the product standard or drawing, in such modification or changes are incorporated in the product submitted for production part approvals are highly recommended, the authorized engineering change documents must submit along with approval processes.
Customer Engineering Approval
The organization requires certain modification in customer provided drawing or product specification, prior to the submission for product / part approval should obtain research and development or engineering team approval. All the required modification in drawing or specification should be communicated through customer’s responsible personnel. You have remembered that, all the modifications and changes should be enclosed in drawing and the approved document must be submitted with part submission warrant.
Design Failure Modes and Effects Analysis (DFMEA)
Design failure mode & effects analysis (DFMEA) is verify essential and powerful quality tool to analyze a design for potential failures modes and its effects in manufacturing processes. You have to remember that, DFMEA should be carried out by a cross functional approach and actions on prioritized failure modes must be completed and the revised ranking must properly have documented. It is important for organization to immediate recommended actions must be identified for all significant characteristics and critical characteristics on significance basic to minimize the occurrence and detention, subsequently, suggested actions for failure modes having high risk priority number must be recognized to reduce in line with appropriately locations.
Process Flow Diagram
The organization must have and submit a process flow diagram in specific or as customer expected format which should provide full vision of entire manufacturing process. Whether it should start from all incoming raw materials and consumable goods materials inspection to packing and pre-dispatch inspection must be covered and specified all operations depicted with specific symbols. If the any inspection process, operation or process carried out outside the manufacturing facility, it must be mentioned in it.
Process Failure Modes and Effects Analysis (PFMEA)
Process failure mode and effects analysis is a powerful quality tool to analyze a process for potential failure mode and its effects. Organization may develop the same In accordance with FMEA Guidelines as previous article in qualitybook.org. Generally, organization must develop process failure modes and effects analysis in accordance with customer specific requirements or as provided technical and standards requirements for particular product or family product. And all the required actions to minimize or eliminate high rating should be documented. Some Example classification table as given below:
Characteristics Classification Table
| CHARACTERISTICS | OCCURRENCE | SEVERITY | DESCRIPTION / CONCERN |
|---|---|---|---|
| Critical Characteristics | —- | 9-10 | Government Rules & Regulation, Factory Acts & Low, Safety Related |
| Significant Characteristics | 5 & Above | 5-8 | Customer Satisfaction |
For mass production i.e. mass materials, process failure modes and effects analysis (PFMEA) rating for SEV (severity), OCC (Occurrence), DET (Detection) specified in PPAP manual can be used to accurate rating.
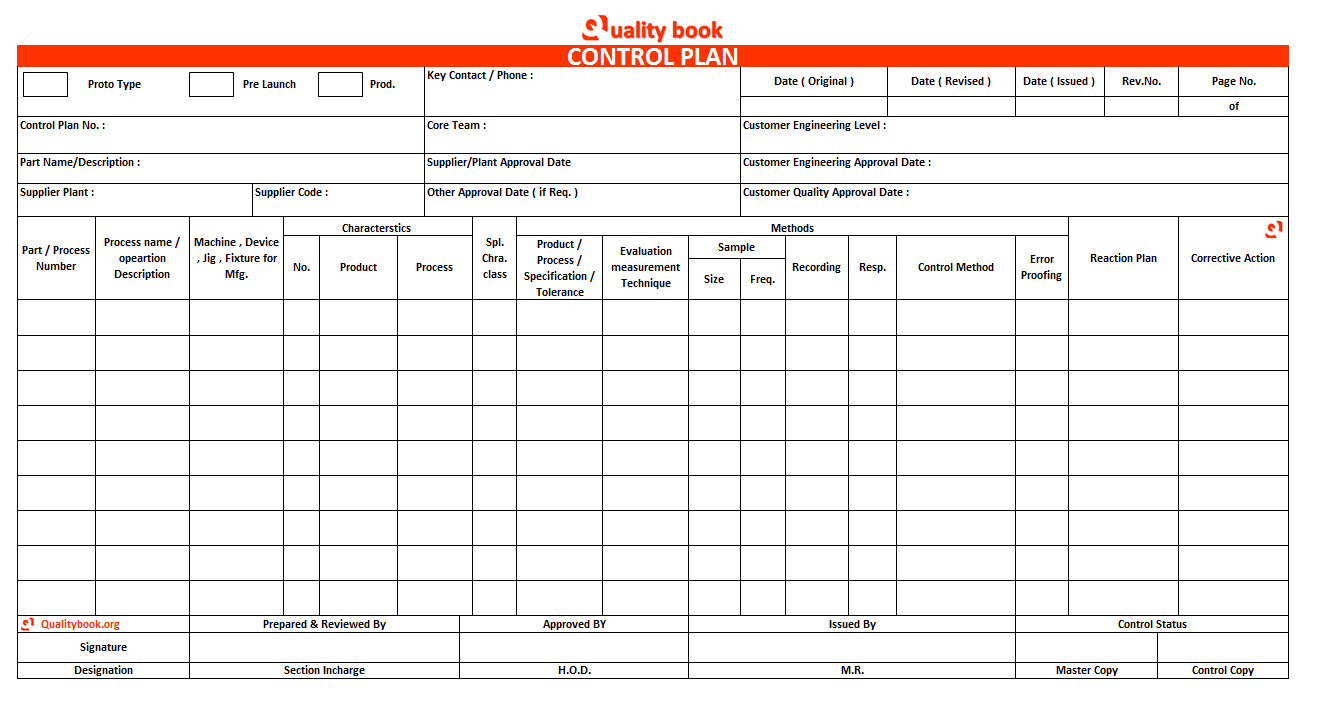
Control Plan
The organization should develop a control plan that describes all methods used for manufacturing & supporting process control and complies with standards and customer requirements. In AIAG reference manual, standard control plan format is available which is highly recommended in case of you had installed ISO / TS 16949 quality system in your organization.

Measurement Systems Analysis (MSA)
The organization should conduct measurement system analysis and evaluation to performed prior to the initial process capability studies. Measurement system analysis is a Process where statistical studies are being conducted to study the present variation in outcomes of measuring & testing equipment system. In the MSA, gauge capability studies are to be conducted for all existing & new gauges, and it should be verified before use in processes. The MSA studies, e.g. Gauge R & R Study, bias study, stability and linearity study, for available gauges, measurements and inspection & testing equipment.
Gauge R & R values should be less than 10% & number of distinct characteristics should be 5 or more than 5 is acceptable for MSA according to standards, if the gauge R & R is above the 30% will not be acceptable and immediate corrective action plan should need to perform to reduce at least 10% to 30%.
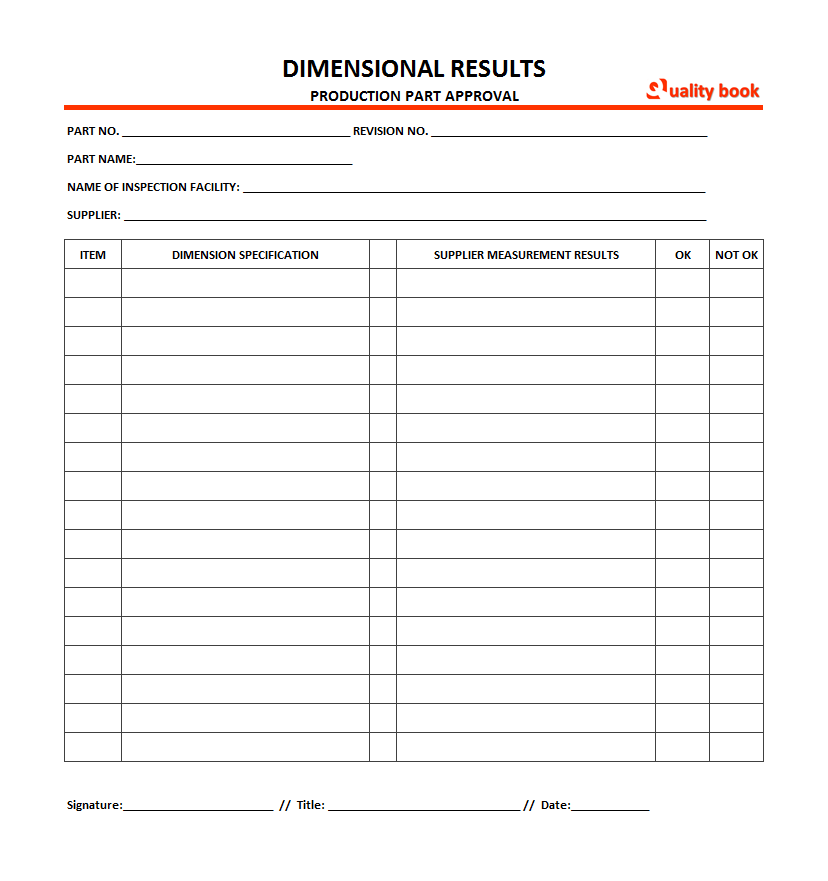
Dimensional Results
It is necessary that the organization shall have dimensional results for each manufacturing processes, and also required submission of dimensional results for parts produced from the production trail run to customer including number of product / part checked and verified. The organization also needs to provide confirmation that dimensional validation required by the design record and control plan have been completed & outcomes specify compliance with specified requirements. Further, you have to indicate the date of the design record modification level and any authorized engineering / and or technical change document not incorporated in the design record to which product / part is made on its dimensional report.

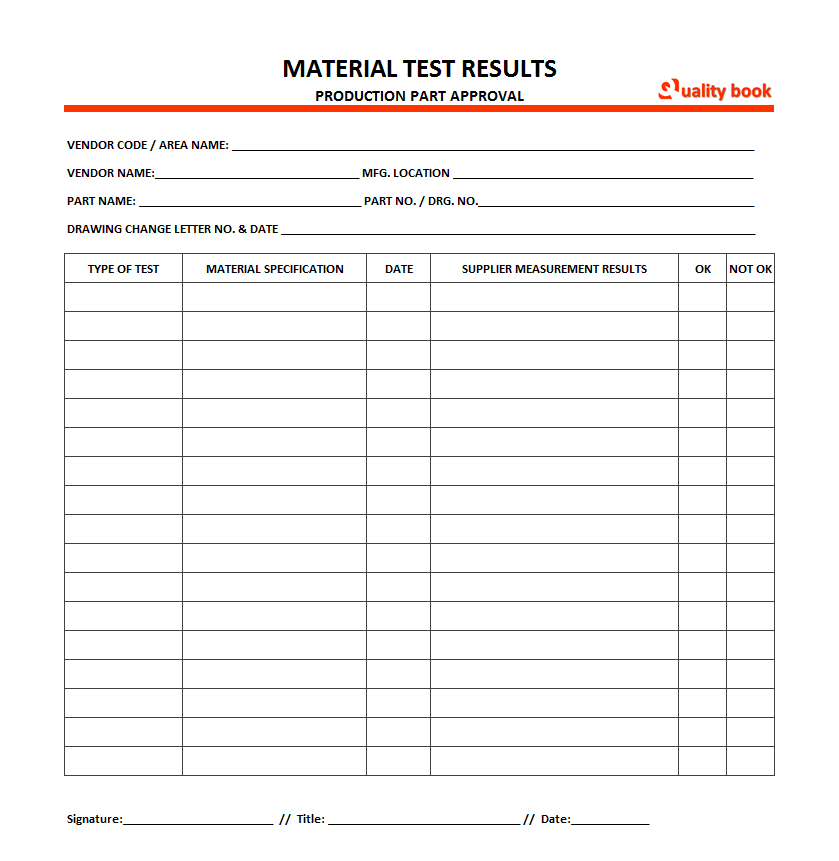
Records of Material / Performance Test Results
The organization should maintain records, material test for all the product and product materials where physical, chemical and metallurgical requirement are specified by the design record or control. All product material tests necessary by drawings and associated design specification should be listed along with quantity tested and the actual outcomes of each assessment. In case of the organization can’t perform the test at its premises, it can have done from approval accredited laboratory and report must provide and enclosed to PPAP submission record. As the standard practice of supplier management, each incoming materials and services from purchasing from supplier it should be verified and approved supplier for appropriate product / service and listed in approved supplier list.
Performance test should be conducted for all the products and groups where performance or functional requirements are assumed in applicable standard or specified in customer order. In-process reliability checks and verification are to be conducted on a defined frequency by organization, or as customer expected, mostly reliability testing processes and in-process inspection as well as it’s frequency are jointly finalized and defined by both the parties i.e. customer and supplier according to product standards requirements / or end application requirements.

The records of test report should must indicate the design records, conducts tests and related specification should be list along with quantity test and the actual results of each tests as well as design record change of product test. Quantity and tested date to which the product was test.
Initial Process Studies
When the organization, no special characteristics has been identify. The customer have right to require demonstration of initial process capability on other characteristics. OK, so how to conduct initial process studies? Let’s see.
In initial process capability requirement, Ppk for special characteristics / critical characteristics should be minimum as define. In case of Ppk is lesser than defined but higher than minimum Ppk defined organization must take initiate corrective actions after the PPAP submission for achieving a minimum Cpk value for minimum value in regular manufacturing processes. Organization shall maintain a minimum CPK value of defined for special characteristics with variable date. In case the Cpk value s lesser than defined minimum value, Full inspection i.e. 100% inspection of the products shall be require the deficiencies are remove and the CPK improve appropriately level.
Qualified Laboratory Documentation
All the testing and inspection for PPAP must perform by qualify laboratory as mention by customer requirements. If the inspection & testing process conducts in house laboratory is only use for calibration. Hence the laboratory must define its scope. In case of outside laboratory use for testing and inspection processes that should be government approved for accreditation or equivalent of that laboratory.
All product tests specify in drawings and related specifications should be listed along with quantity tested and the actual report of each inspection & testing. The external testing results and related documents must be submit in PPAP documentation and also needs to enclose all the outside laboratory from where tests are carrying out.
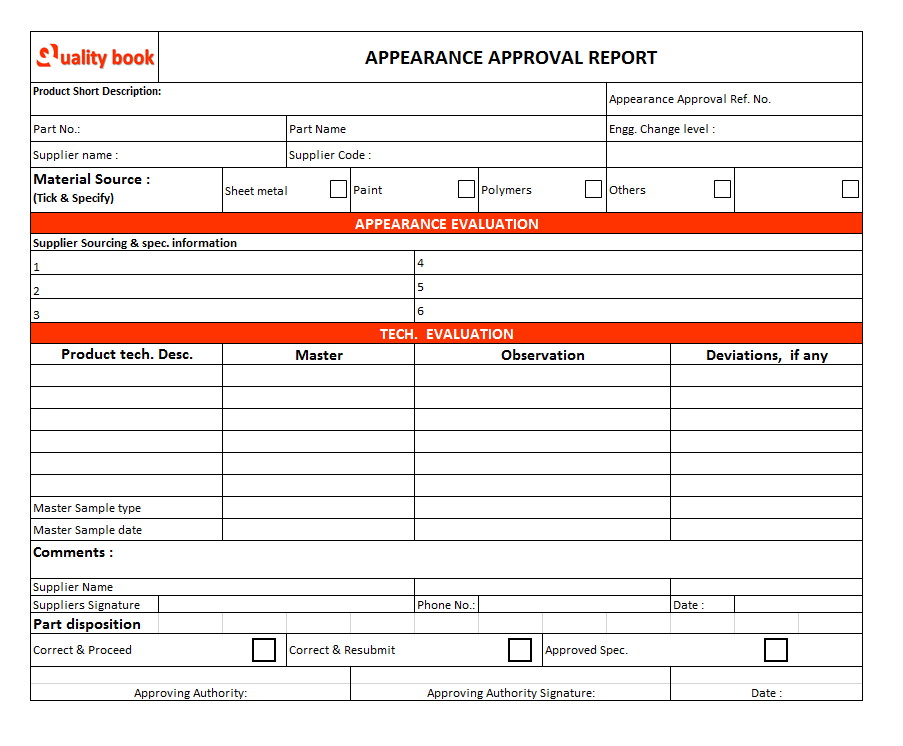
Appearance Approval Report (AAR)
You have to verify the design records, in case the design record described each product or parts needs to appearance approval report than you have to prepare a separate report of each one, and all the required criteria must be complied upon satisfactory. Appearance approval report mentioned all the required information, and appearance of product i.e. product color, size, measurements, etc., requirements and is visible to customer, generally photocopy of product with high resolution is recommended must be submit along with the PPAP documents.

Sample Production Parts
The organization should submit at least three to five samples of the product to customer, unless agreed and mentioned on the product submission warrant, along with applicability table. The sample products should be appropriately measure for dimensional results and the same to be use for fitment trail.
Master Sample
The organization shall retain the master sample for period as long as the product is active plus on year or as production part approval records, or until a new master sample is produced for the same customer – part number and approval process is conduct as per standard or customer reference to meet design records and inspection criteria. You have to retain a master sample for each position as specify by customer, it shall have following details:
- Part No
- Name of Customer
- Date of PPAP approval
- Customer Part No.
Further, All the master samples should be manage in good conditions, and separately organizing with proper identification.
Checking Aids
The organization shall provide any product specific assembly details or part checking aid in case of customer specifically request. It is also important that, organization shall confirm that all characteristics and features of the checking aid match the measurements and dimensional requirements. Including like gauges, models, templates specific to the product being submit. The organization must have drawings for all checking aid. Other than the standard instruments, and shall document all release manufacturing design changes. That have been integrate in the checking aid at the time of submission.
Customer-Specific Requirements
The organization shall have manage compliance to all specific requirements of customer. Any specific customer requirements identify by head of department or nominate representative is to be sought and mention in the part submission warrant. And to be carrying out by the PPAP implementation cross functional team.
Part Submission Warrant (PSW)
On completion of all the PPAP requirements. The organization prepare and complete the part submission warrant because, this document is use to formalize approvals from customer. Hence the organization / supplier must require to submit part submission warrant for approval along with other documents for verification to approval. It is important for supplier to submit part submission warrant for each part separately. Where all of the measurements and test results indicate conformance with appropriate drawings with specification requirements.
PPAP Submission Requirements
Submitting a PPAP documents is important, but challenging experience for automotive suppliers. Actually, to complete the entire process, it will need a significant amount of time, resources as well efforts of team. In case any failure to complete the requirements of PPAP submission, it can results the rejection and delays in the production processes.
For the PPAP documentation submission – compliance of each document, evidence and other associated details to customer can be key objective of the supplier.
There is also somethings that can create confusion. Remember that, each customer has its own set of submission requirements. There one customer focus on any specific document, where possible second customer has not significant value for same document. So its all depends upon the internal process & product applications of customers.
That is the reason, supplier should carefully review and understand these requirements. However, there is specific standards – AIAG PPAP manual & ISO/TS 16949 has all the require information about submission. So that, supplier should also refer the this standard to meet customer requirements.